PROFESSIONAL TOOLKIT: Technical Experiments for VFX
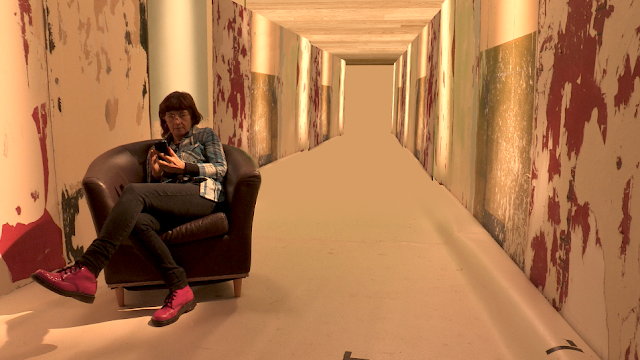
After receiving test footage that we did on the day from Anne, knowing that i may end up as a Visual Effects Supervisor in post-production, i went ahead and did some technical experiments to create a "proof of concept" for the digital set extensions.
Now there will be technical mumbo-jumbo in this post, so bare with me (when i'm refrencing a "plate", no it's not something you use for food...)
First of all i dove in to the rushes using AVID to trim the shot that i wanted
Then i exported the sequence as an Apple ProRes 422 for further manipulation.
First step was to get a solid track from the plate. I decided to use PFTrack as my software of choice as i have previous experience and it has proved to be reliable an accurate.
After a mask to exclude anne from the track, an automatic track an solve seemed to give me a pretty good result. I was surprised that the tracker picked up the smaller markers but ignored the bigger ones. Because of this it is important to have a good variation of sizes for the tracking markers, for different types of shots.
Also i used the software's features to create an accurate representation of the two walls and extract a partial texture.
After all the tracks were done and exported as FBX files (a universal file format for exporting 3D data), i opened up The Foundry's NukeX to deal with this complicated composite.
Firstly just to test the shot out i moved the two walls i created in PFTrack further back. The result was pretty weird but proved that the 3D geometry was accurate
Now even though we had a green screen in the shot, because we didn't have any on the floor i had to create an animated roto-mask around Anne and the armchair. This process was assisted by point trackers.
After that was done, i duplicated the wall geometry a couple of times and set it even further back, and created a temporary floor and ceiling to start roughing in the room. Then using the same tracked geometry, simply by re-texturing them i managed to create a soft matte that would blend the live action with the CG. This matte was then merged with Anne's matte to create the final blending matte
The CG walls and live action were merged using this blending matte.
After this main composite was completed, using a z-depth pass from the 3D walls i added a slight depth of field, and did a temporary color correction to cool the room down.
This is what the final node graph looks like


0 comments: